I have several different methods of changing out the older axial capacitors posted in various places onsite, but here's another method of using them on an A082-90421-xxxx Midway medium power supply board done in the wee hours of the morning to keep a promise to John V.
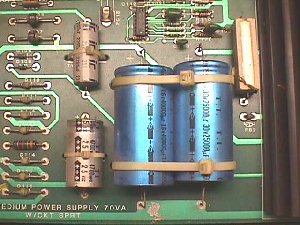 The actual setup I'm doing is a not-so-pretty configuration, but it shows the basic principles involved electrically. Once you grasp that concept you can see how you could arrange the new caps many different ways on the board so long as you wire them them up correctly. K... let's change out this 40K & 25K axials using three new fresh 22K radials. 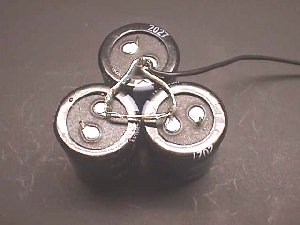 The first step was to set the three in a triangular configuration on the bench with all the ground legs facing the center. Then a piece of black 18ga wire approximately 12" long was stripped & tinned on one end about 3 inches. Starting at any one of the 3 ground legs it can be soldered on in the same triangular configuration tying all three together to serve as a ground terminal for all while stabilizing the stack on one end. 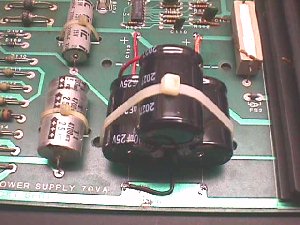 Now the stack can be placed on the board & fastened in place with a 12" cable tie making sure that the insulated part of the new ground terminal wire is placed at the bottom where it can be soldered to either one of the 2 ground tie points left after removing the originals. 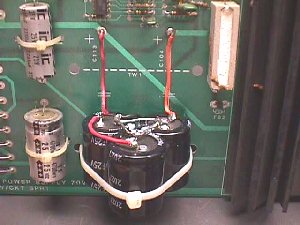 Next step is to tie in the positive legs. The one on the left was a single 40K so a piece of red 18ga wire was soldered onto the top capacitor + terminal & then looped to the lower cap + terminal & finally over to the + tie point on the board. This combines the 2 capacitors in parallel to form a new 44K filter cap. On the right you simply have to tie the remaining cap's + terminal to the + tie point on the board's right side to tie in a 22K fresh replacement which is more than adequate to replace the existing 25K. 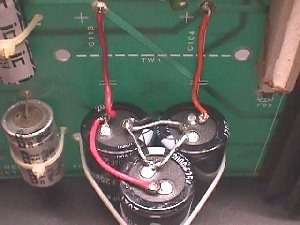 You can add hot glue to stabilize if needed, or desired, and as I said in the beginning, as long as you maintain the electrical circuit you can place these caps in a number of other arrangements & they wouldn't necessarily have to be stacked, e.g., the 2 combined ones could lay flat to the bd where they are now, while the single cap could be placed above it flat to the board. There is no limit to the ways this can be accomplished as long as the electrical integrity is not compromised. Caps can be hot glued on end any place on the bd where there is room for them & wires run to the appropriate tie points on the bd... which do not necessarily have to be where the old ones were since you can follow along the bd trace to a more convenient spot to tie into. For that matter, you are not restricted to using the board at all. If you find there is no room for a replacement cap you can mount it remotely... bottom of the cab...side...if ugly is your thing you can mount it on top of the cab if you want, so long as you run wires to their respective tie points on the PCB they will still function the same. Happy Gaming... |