|
Finally! I've literally had this on my desk for 10 years now & although I am midstream on 2 other projects currently, a certain party needs help with this at this time. Being that he is probably the thousandth person to ask over the years & I've always planned to have done it right after each inquiry, I decided to just do it now before another 10 years passes. I'm talking about all those broken Wells-Gardner K4600 width coils :-( As many of you have found out the hard way, the K4600 coils are nearly impossible to transplant. I don't know how many times I've heard/read this one... I found a good K4600 width coil & I tried to pinch the little metal tabs in to release it, so that I could put it in my pristine K4600 monitor with the busted up width coil only to have it fall apart before I could get it out :-( The reason these coils do not take well to removal is because of their continous service over the past 28 years that has made their cardboard sleeves weak & brittle. A successful removal would probably run 1 in 10, but there is a way to safely retrieve them for many more useful years of service. Let's start with that old clunker that you spotted in your local ops warehouse junk pile with a perfectly good width coil mounted on it. 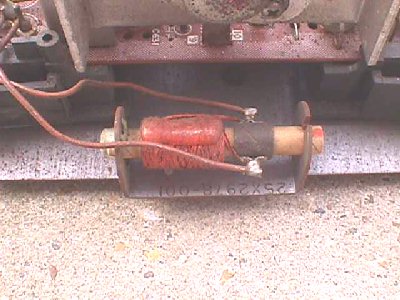 You haggle it from him for whatever coin you have to spare & take it home & check the ferrite core to be sure it is free turning... most are... with your plastic width coil adjuster. It passes & you're ready for surgery. Since you know that the sleeve is brittle & cannot be tampered with, your only solution is to transplant it cradle & all... like in the nursery rhyme :-) Look at the bottom of the chassis pan & you'll see that the cradle is outrigged via 2 rivets. 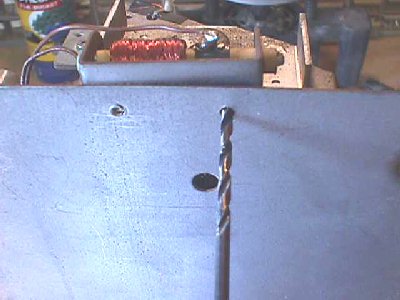 Secure the chassis by whatever means you have at your disposal and use at least a 3/16" drill bit to drill the rivet tails off. It is important that you do not use a smaller size bit as you may end up drilling through enough to release the rivet & allow the bit to penetrate the very sleeve you are trying to salvage. 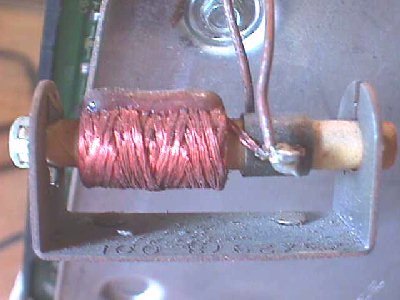 A successful removal of the cradle will look like the pic above with the rivet heads still intact. The mounting holes are mostly hidden by the body of the coil, so you really do not want to attempt to get physical in trying to remove the heads. Simply deburring the rest of the rivet tail will allow the heads to roll... as it were :-) 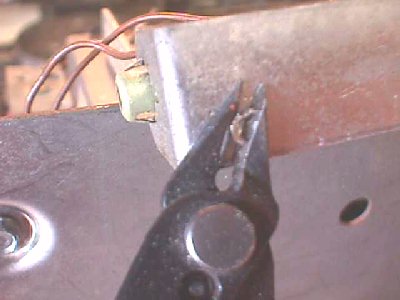 We have so many flushcutters at our disposal that I use them for everything from snipping coat hangers to pulling teeth, but you may want to use a pair of diagonal cutters, side cutters or even a pair of needle nose pliers to debur the rivet tails. 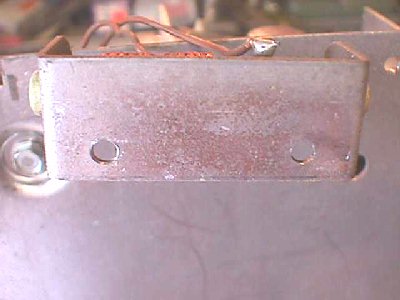 She's free! Well... almost. The wires were left intact as a safety net... should the coil & cradle accidentally fall it would have a short trip that would not cause damage to it. 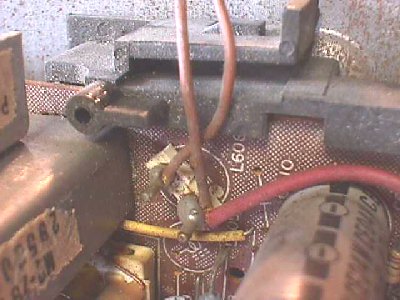 Now the wires can be cut freeing it up entirely. You can unsolder them if you like, but just a quick snip will work just fine. 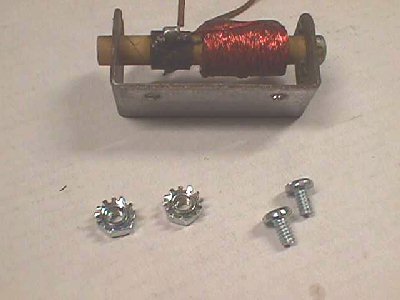 A couple of 6-32 x 1/4" machine screws & a couple of 6-32 kep nuts will reattach the cradle/coil combo to your transplant recipient. As I have said, there is very little room between the sleeve & the cradle making a hard job of placing the screws in the holes when you have big paws like me, so here's a little tip you might try... I use regular household scissors to cradle... not another cradle :-()... the screw head & slide it over the hole & let her drop in. 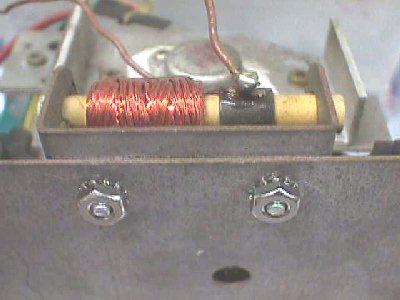 Here's why you need to use kep nuts... there is no room to use a screwdriver on the screw heads for tightening them. The kep nuts will bite in & allow tightening from the bottom rather then the top. 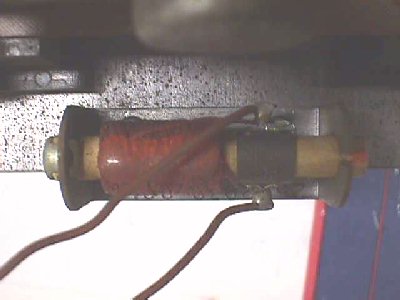 You can see from the pic above that a screwdriver is just out of the question. Okay... all that is left to do is to reattach the wires. There are many different ways to reattach the wires to keep this 100% detachable for any future needs. You can add in a couple bullet connectors (single housings) or a 2 position plug & receptacle, but the best way I found was to crimp on a couple .062 sockets & add a tad of solder to stiffen them up. They simply plug directly to the posts that they were soldered to originally. Hopefully, this will be of help in saving the lives of a few width coils. Happy Gaming... PostScript: Yes... I do have just a few of these salvaged coil/cradle combos at $10 each with mounting bolts. |