|
Most game manufacturers used T-nuts stapled to the bottom of the cabinet to screw the leg levelers into & as we all know this did not fair well for games that were often transported from location to location. The leg levelers got hung up on tail gates, dollies, curbs.. anything that got in their way... and often times would pull the T-nut completely off the cab. Sometimes just sliding a game into position would bend the leveler enough to rip them off entirely. When these injured cabs came through the shop we always mounted new heavy duty leg leveler plates & it's all we used on our new cabs, as well. Looking at pieces of what once were cabinets post Katrina the one thing that really stood out was that the leg leveler plates were still intact, even when the bottom was separating from the rest of the cab, proving that these most likely will last a lifetime. I've explained mounting the leg levelers & plates to newbies so many times over the past 14 years... doubling over the recent craze of building your own cab to house the multi-game bds... that I figured I best note it here to point future builders to. 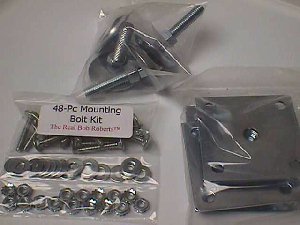 K... you got all these parts & now what to do with them. I made a simple cab bottom corner cutout & I'll run through this for one mounting & leave you to your imagination for the other three :-) The very first step if you're doing a replacement is to make sure there is no wiring or components such as transformers, power supplies or filters in the area of the 4 mounting plates on the inside of the cab. The last thing you want to do is drill blindly and pull a fistful of wiring out of the hole when you pull the drill bit out :-( 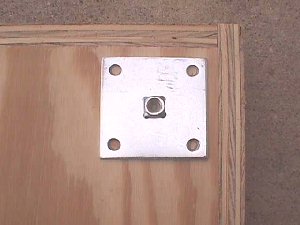 Step 2... Line up your plate one inch from each cabinet edge and use it as a template to mark your drill spots. 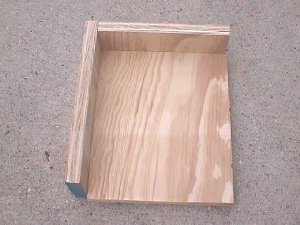 Step 3... Just taking a second look inside to be sure nothing gets drilled! :-) 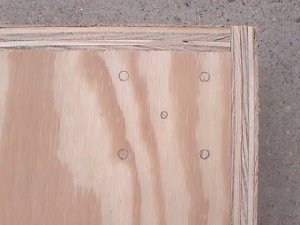 Step 4... Use a quarter inch drill bit to drill the 4 outside holes. 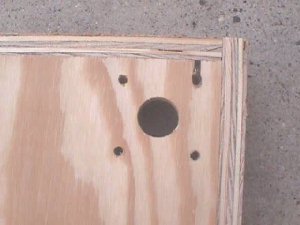 Step 5... Use whatever you used to drill out your 1 1/8" CP button holes to drill the center hole. This is something you should already have onhand making it an easier job & it makes for a roomy hiding spot for the welded nut, as well as, a neat & smooth finish job on the underside where you have to stick your hands for final adjustments. 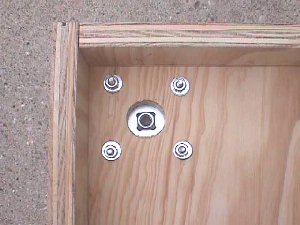 Step 6... Fasten the plate with the 4 carriage bolts, washers & kep nuts. Using kep nuts eliminates the need for a lock washer & binds the slotless carriage bolts in a tight cinch. 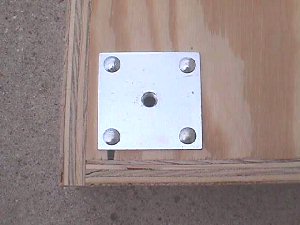 Step 7... Ready to install the leg leveler making sure to leave the nut on it.  Step 8... Install all four leg levelers to approximately the same distance for a good starting point. 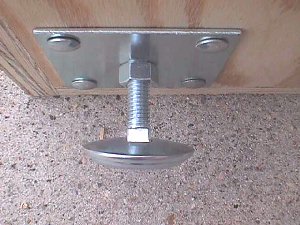 Step 9... After your cab is in it's final resting place you can level it by adjusting each leveler & once you're happy with it you tighten the nuts to the mounting plate securing each leveler in place for eternity... or until the next time you move it. If you want a complete kit for your cab you can just ask for Bob's Leveling Kit ($18.00) to save shopping the individual items on the Parts Page. Happy Gaming... |