Well... the day has come! I've bought in all the parts needed through five different sources, although some did have all the components, but were so cost prohibitive that they far exceeded the multiple shipping costs. I think if you own a Tron, Spy Hunter or other Midway game that uses the 90412, you'd be well served in restoring this linear. Now I don't mean that you should take one that is so eaten by acid that you would need to bead blast it before installing the new components, but it is a shame that so many salvageable power supplies are collecting dust, or worse yet, laying in a graveyard somewhere. If you want to revive one via bead blasting... go for it by all means... but it isn't practical for everyone.
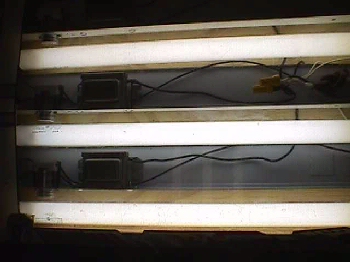
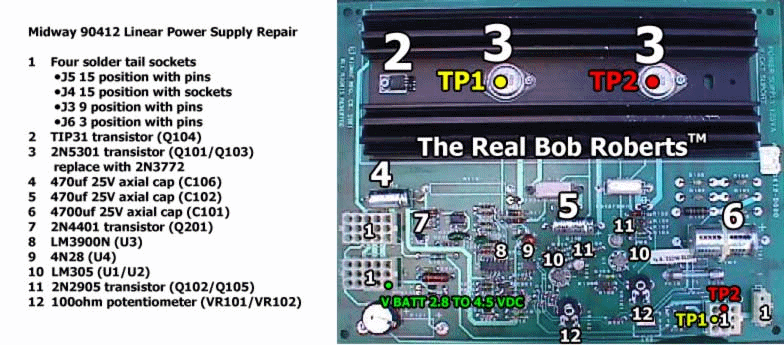
Yes... I'm rambling on giving the pic time to load :) It's a pic of the power supply that I have numbered for easy location of the components. I took a pic of another helpful device for your shop, garage... living room table while the spouse is away;)... and that is a light box. It can be used to see through the PCBs as needed in this case to see that corrosion had not crept up into the pins & sockets, but it has many other uses in checking solder joints, trying to follow traces above & below the board when repairing them, while clearing solder pads, so that you see they are, in fact cleared, to name a few of it's many uses.
These are very easy to throw together. All you need is a piece of plywood to mount 3 or 4 flourescent fixtures on and then add a couple pieces of strapping on two sides to mount a piece of clear plexi over them. Makes a dramatic difference in the way you see a PCB as pic'd below. I guess the pic of the 90412 is surely loaded by now :)
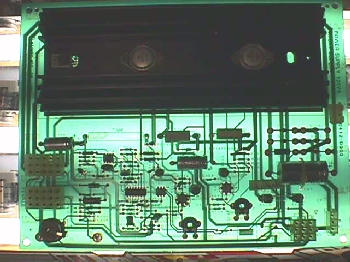
Ken Colangelo doctored up this pic a little better
here.
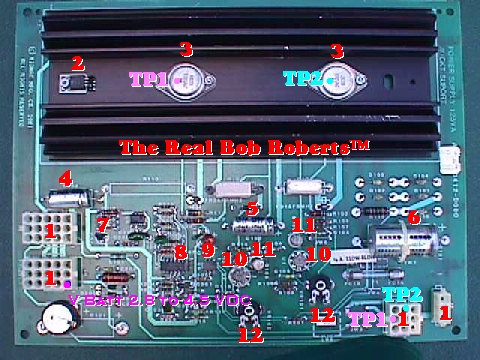
Here's the pic showing the parts placement by numbers. It should make locating the components relatively easy cutting the repair time down to a minimum. I'll put the parts list that comes with the kit in here, as well.
Midway 90412 Power Supply
This kit contains the 19 components listed above to shotgun repair the Midway A082-90412-C000 as found in such arcade games as Tron (1982) and Spy Hunter (1984).
Care should be taken to insure that caps are installed with the proper polarity & that connectors are replaced in exactly the same way as you remove them. The PC board has the polarity silked onto it, as well as all the rest of the parts along with the number 1 to indicate pin 1 of the socket housings.
If you have a multimeter I would suggest that you measure ohms from Q103 metal case to J3 socket position 8 to make sure you have continuity... dead short... and from Q101 metal case to J3 position 6, again looking for close to zero ohms, before reinstalling the power supply in your game.
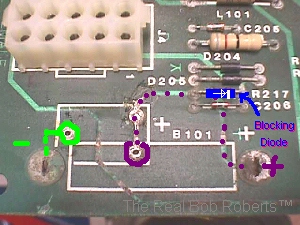
Adding fresh new solder to any joints that you are going to desolder will aid greatly in the removal of the old solder since most of the PCBs have battery acid present from the board mounted ni-cad battery. To prevent further damage to the PCB I would change the battery system, as well. You can do this several ways, but I would stick to the trouble free methods of either installing a new ni-cad & mounting it off board via a married pair of speaker wire which has a stripe on the ground side to help you identify it, or install a lithium battery & holder onboard & change R217 resistor to a 1N4007 blocking diode... colored band away from battery. " AA" batteries & holder designed for portable radios & such, are not recommended for use in arcade games. If you must use them a containment holder should be built that holds them tightly in place... the same way they are secured in radios, alarms, or just about any apparatus whereby you must remove a screw in the cover to get to them.
Onboard socket housings may appear to have nice clean pins in them, but you can usually look at them with a magnifying glass & tell right away if you can skate on replacing them. If you see ANY signs of green discoloration, especially in the center openings of either the pins or sockets, you should replace that housing. Since it is no great feat to install & remove this power supply, you may want to try it before changing U1 & U2 which can be a little tricky to replace if your skills are not quite what they should be. If it works fine with just the other components replaced, I'd skip this at your option, because, although these regulators often look like an ugly gob of corrosion, they usually work just fine... none the worse for wear. If you do change them, note the index tab that pertrudes from the top marks the last pin (8) & count starts with the next pin going in a counterclockwise direction.
Happy Gaming......
Help Page Index Big Bear's Bulletin Board Site Index