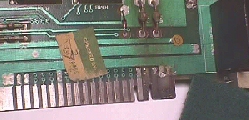
There seems to be a lot of PCBs today that have the edge pads burnt right off. Pac boards seem to be the most vulnerable due to the less than adequate edge connectors that were utilized in the cabs, but there are many others, as well. I'm asked frequently how I repaired them over the years & of all the ways that I accomplished this repair, I believe this one to be the ugliest, but yet the best as far as longevity goes. I used less invasive methods whenever possible, but when you have something at least as bad as the one pic'd below, it is somewhat of a necessity.
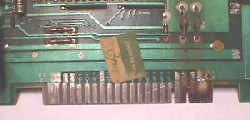  As you can see, the pads on the parts side of the board at power entry points are pretty much disintegrated :-( This is the board that you will sometimes see an op's handy work on. I'm sure you have seen them jumpered with something like lamp cord soldered directly to the board & spliced into the harness... or worse :-( I suppose it was better than file 13, and perhaps my method isn't much better, but it is easy to maintain & is still plug n play.
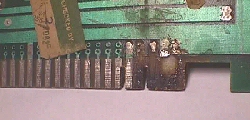
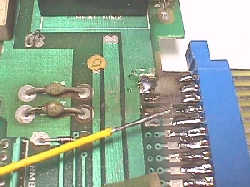
  The solder side of the board didn't fair any better than the parts side. I've seen them before with this little corner completely burnt off & some that were so charred that someone had cut them off with a saw.
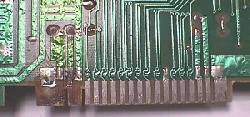
  The first thing to do is to is to get as much of the carbon residue off the board as possible & I normally use a Scotbrite pad for this. Depending on how corroded the rest of the pads are, I either use the Scotebrite gently to bring back the shine or an eraser if they are in decent shape. If an eraser is used you should make sure your eraser residue falls away from the board. Many times I've seen socketed chips that were assumed bad actually being the victims of this non-conducting residue!
An air compressor will usually remove any loose debris, but sometimes forces it into a crevice where you really didn't want it. K... all cleaned up & ready to move on.
The first thing to do is to is to get as much of the carbon residue off the board as possible & I normally use a Scotbrite pad for this. Depending on how corroded the rest of the pads are, I either use the Scotebrite gently to bring back the shine or an eraser if they are in decent shape. If an eraser is used you should make sure your eraser residue falls away from the board. Many times I've seen socketed chips that were assumed bad actually being the victims of this non-conducting residue!
An air compressor will usually remove any loose debris, but sometimes forces it into a crevice where you really didn't want it. K... all cleaned up & ready to move on.
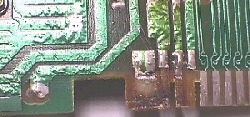
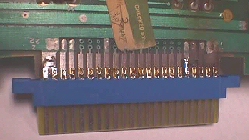  Time to slip a 22/44 solder eyelet connector over the pads in much the same way as making adaptor bds. The type 3 fingerboard in the connector is going to become your new edge... a replaceable one in the future, if need be. Tack it in place, check to see if it is perpendicular & then finish soldering it to all the pads that are still there.
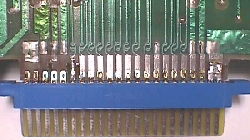
 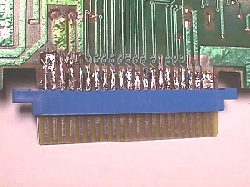 Now it's time to bridge those gaps where the pads are missing. Take a piece of 18ga wire & tin about 3/4" of it, solder the end to the connector SE & then lay it down onto the remains of the old pad, solder & clip off the wire. Repeat for each missing pad.
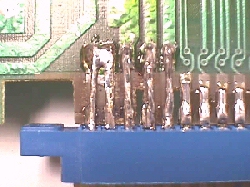  Like I said, it's ugly, but it is a permanent way to save a badly damaged board.
This connector/fingerbd combo is available on the Parts Page:
PCB Edge Repair Kit 22/44 $8.00
Happy Gaming...
|