|
How do I use a radial cap in place of an axial? It says on your cap listing that several of the caps "can easily replace axial" How? I read these Q's so often that I decided to put a quick link here to point to another of my pages. 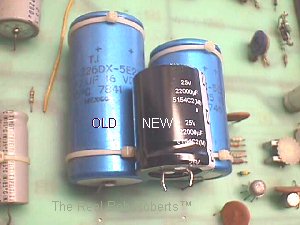
|
Using A Radial Cap To Replace An Axial Cap
|
How do I use a radial cap in place of an axial? It says on your cap listing that several of the caps "can easily replace axial" How? I read these Q's so often that I decided to put a quick link here to point to another of my pages.
|
|
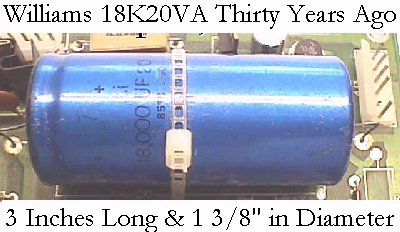
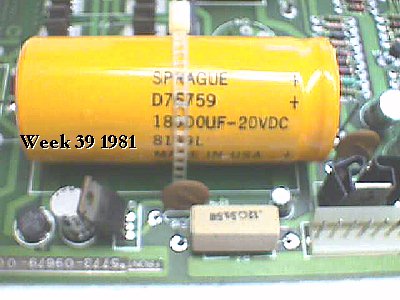
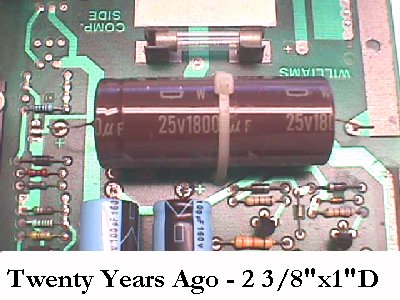
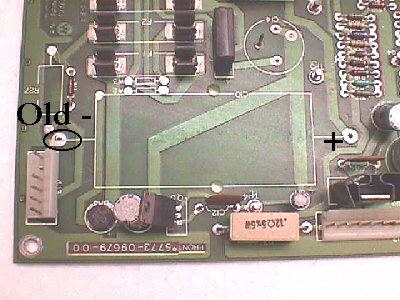
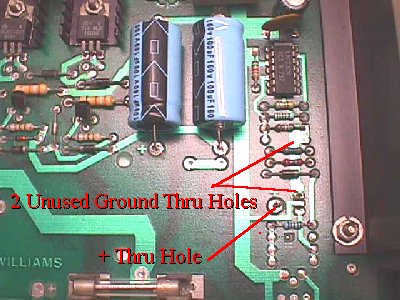
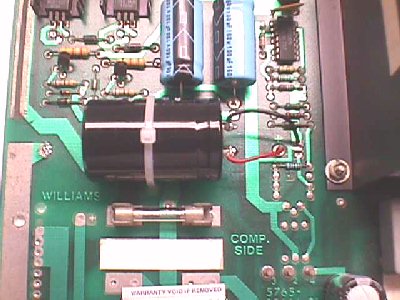
Update 6/08: Now the question has become why do I need to use radial caps? High value axial caps are obsolete & have not been available for well over 10 years now. I hear people tell me they've found a source for these old dinosaurs every once in awhile & the first thing I ask them for is the coded numbers on them & 2 easy ones that have popped up a couple times are 8150 & 8610. These are straight forward dates as found on many electronic components & are the year & week of manufacture, i.e., the first one was made in the 50th week of 1981 making it 26 years old, give or take a day or two. The second one then becomes easier to see that it is newer & was made in the 10th week of 1986, but still 22 years old, which means that it could be older than the one you are replacing in your classic & quite possibly in a lower capacitance state. This would account for the many times I've heard that 1... it didn't work as well as it did before I changed the cap... and 2... it worked fine for a few hours-days-weeks & then crapped out. Another common Q is how else can I do this substitution? You can find a CG (Computer Grade) cap at a comparable value & add a couple wires to feed to your PCB or the better way is to use the newer, common, less expensive & more likely to be fresher, snap in capacitors of a comparable value. The wires need to be soldered to the snap in terminals & fed to the PCB. In both these cases you can look for new contact points, or even make new ones if need be, to accommodate both the new wires on one end or the other, i.e., not fishing a wire to the opposite end of the new cap. This will probably be easier with pic'd examples, so let me pick on Williams' 18,000uf20v-25v-30v axial caps.

Update June 2009:
Replacing even larger caps as found on the Midway 90421 & 90427 linear power supplies addressed here:
|