|
Seems a lot of newbies are having trouble with crimping pins & socs, so here's a quick note on it & links to other germane pages.
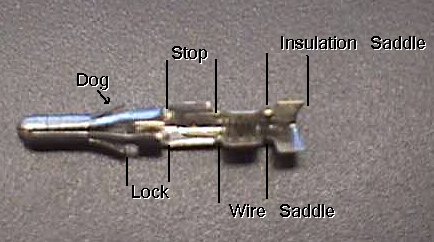 When crimping each saddle you need to be sure you are on just the specific saddle especially when crimping down the stripped wire saddle. If you go over just a bit your crimper saddle will crush the stop ears allowing the pin or soc to just push right on thru the connector rather than locking it in place. What holds the pin or soc steadfast in place when you push it into the connector is the stop on the back side & the dogs on the front side. When you push the pin or soc all the way in you'll here a little click & that is the dogs snapping open to lock them in place. 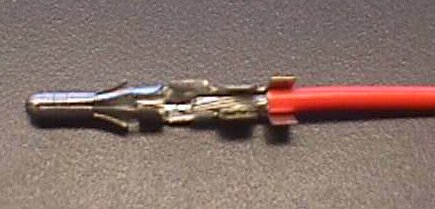 Your stripped wire can be longer & go past it's crimp saddle without interfering with the process. The saddles are longer than need be & just one hard crimp will more than likely just smash it down flat & you don't want that. Many a newbie has done that & then another no-no to try & correct it... soldering them! You never use solder on crimp pins/socs. The first step should be done with the largest saddle on the crimping tool... just applying a moderate pressure while looking at the pin/soc saddle to see it begin it's roll motion back toward the center. Now that they are started you can go to the smaller crimping tool saddle to finish the crimp roll & rather than one swift movement you get a much better crimp by rolling back & forth with moderate pressure in three positions. 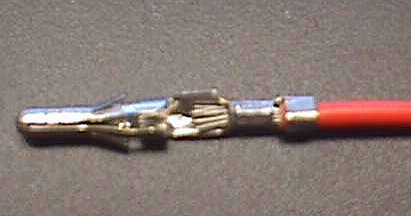 Your finish crimps should look like the above & be rounded rather than flat & with the stops still butterflied outward to secure the pin/soc into the connector housing. Using the HT-1921 crimping tool video. Crimping & extraction on the Crimp Mystery Page.
Happy Gaming... |